
How to Thermally Optimise Your Design
Residential Building Sustainability Rating Tools in Australia
We were recently invited to contribute a case study for a resource published by the Australian Institute of Architects (RAIA), titled ‘Residential Building Sustainability Rating Tools in Australia.’ The paper is a fantastic resource by Usha Iyer-Raniga, Trivess Moore and Olivia Ho and we were very honoured to have our project and processes help up as a valuable example. We’re excited to be able to share our case study section with you here, and you can access the full resource at the end of the article.
This case study is about working effectively with a collaborating NatHERS consultant. For this project, we worked with Light House Architecture and Science. The graphs below were produced by Light House for the purpose of a national industry seminar we co-presented to Australian architects.
Project Background
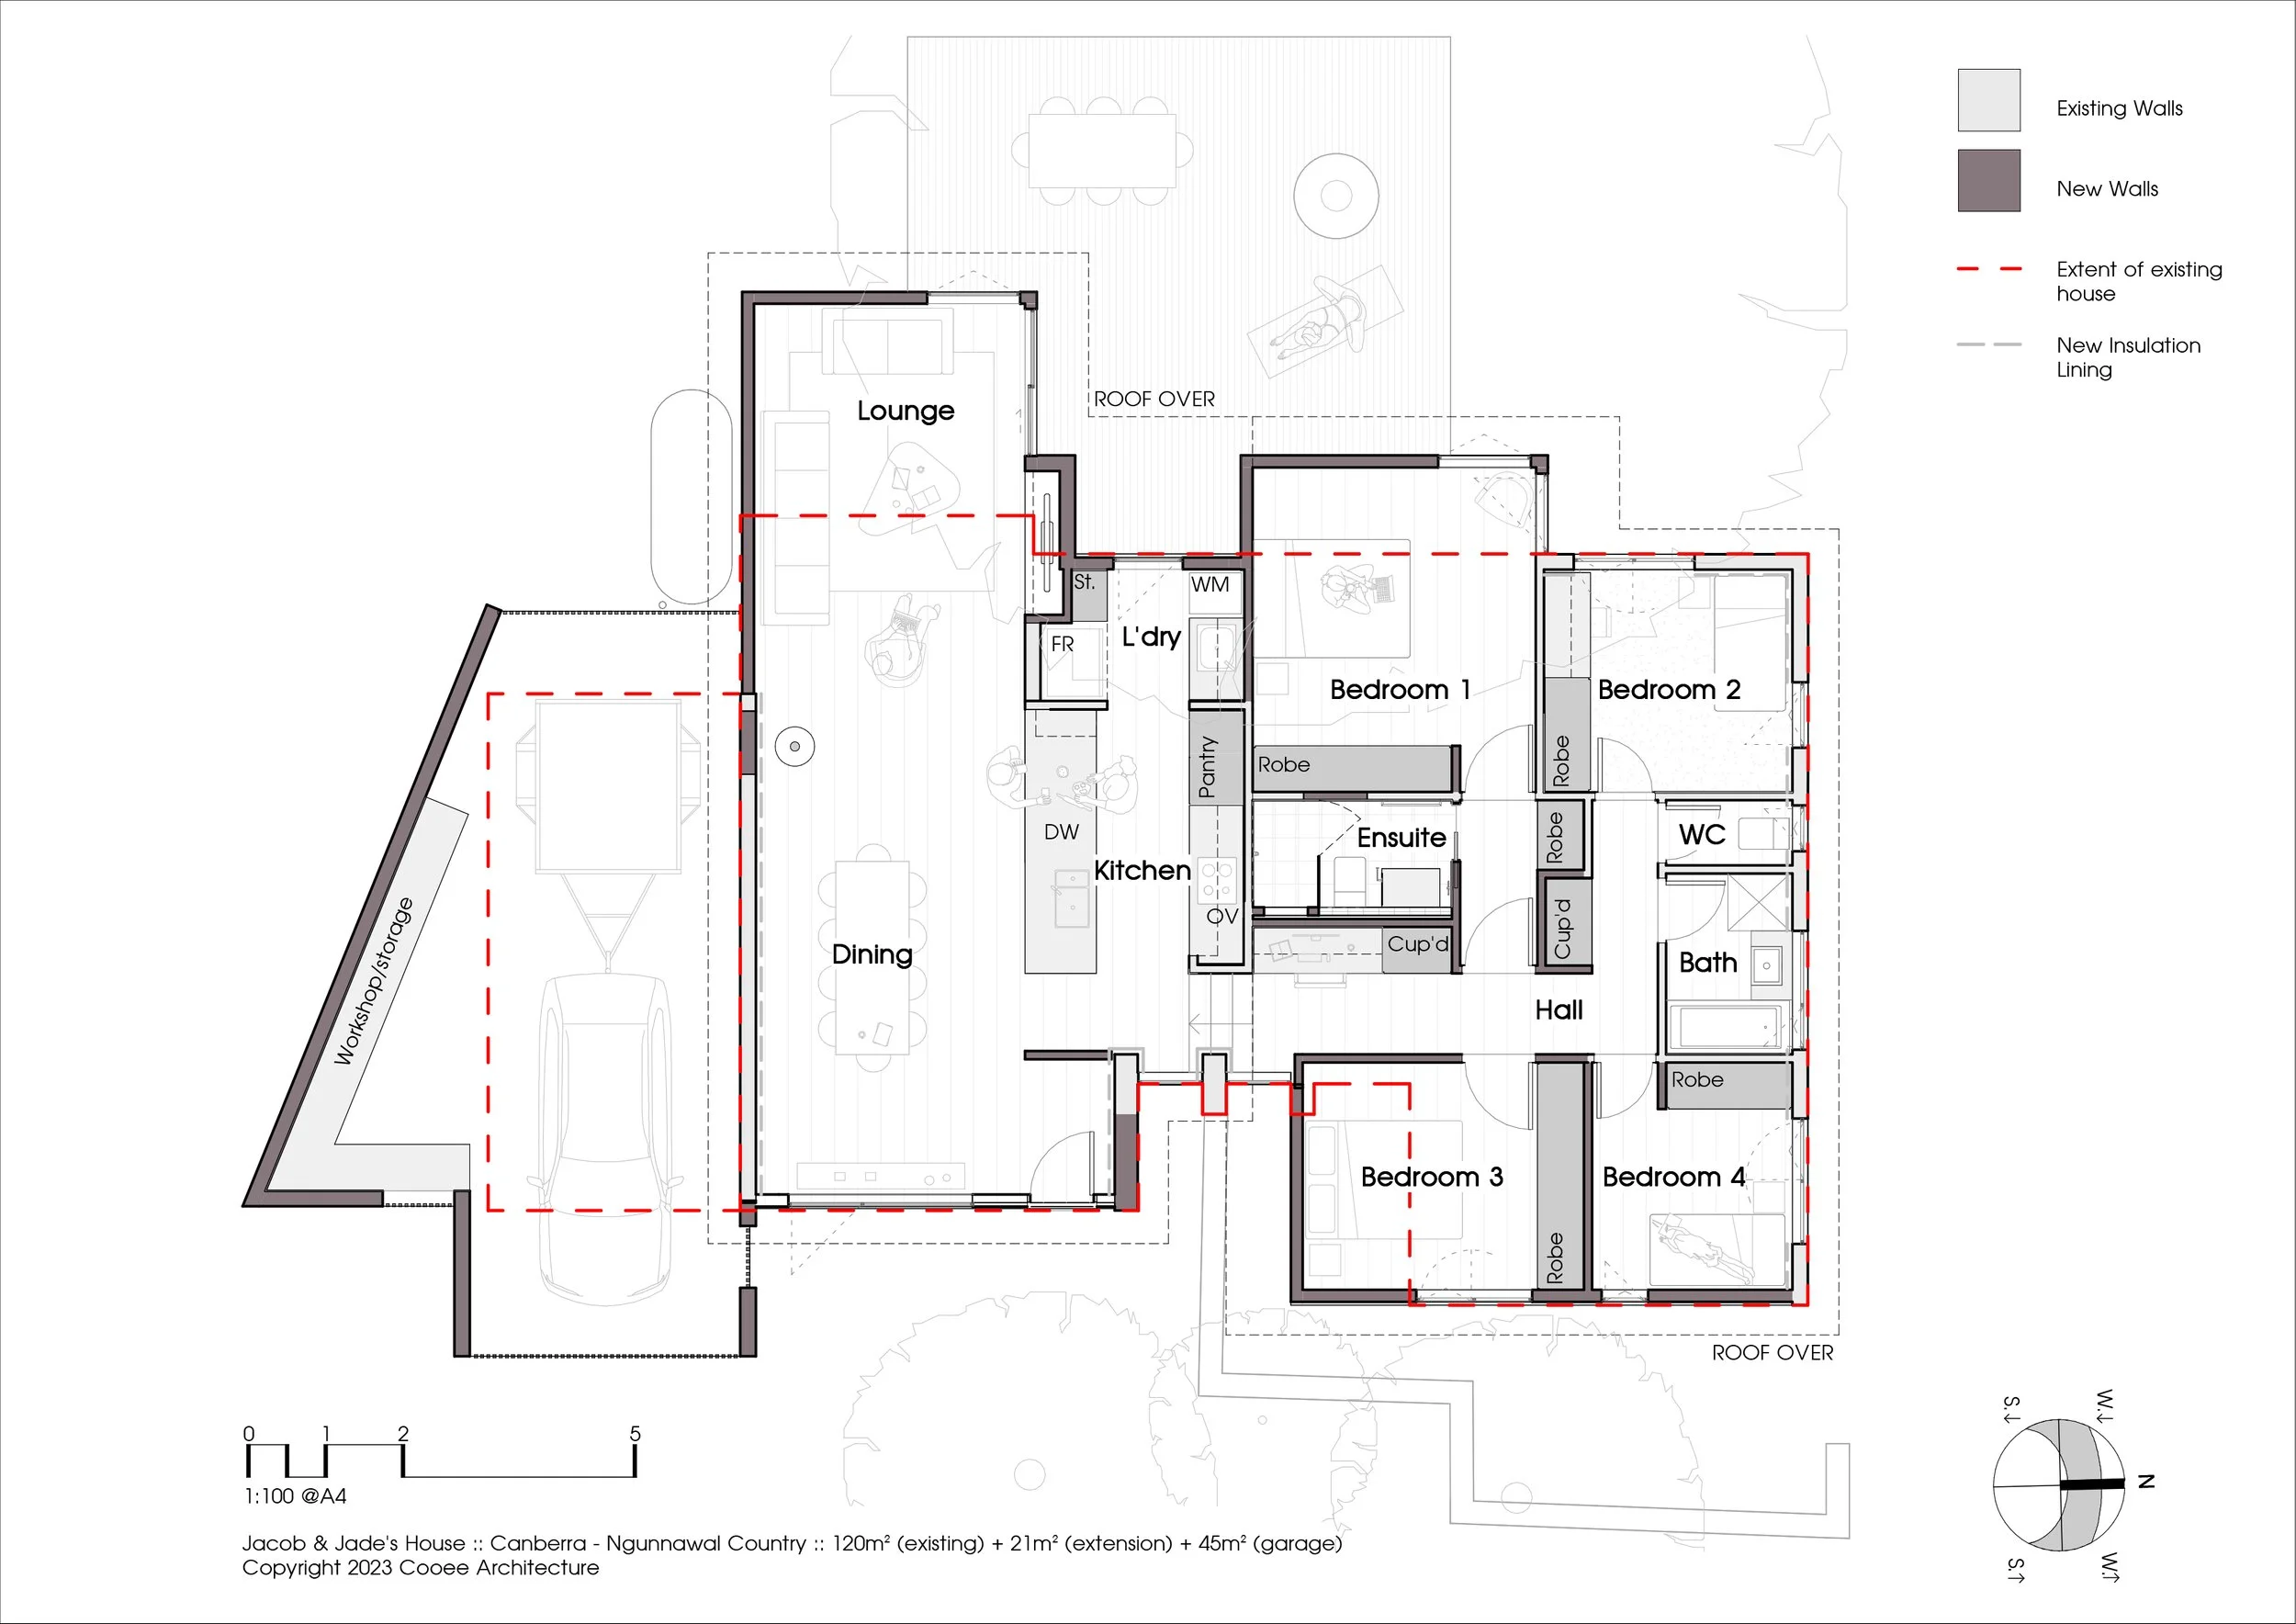
Project background Jacob and Jade’s House was freezing cold, draughty and dysfunctional. Its original condition included a concrete slab on ground, single-skin uninsulated concrete block walls, a very thin roof structure with minimal straw insulation and single-glazed windows (with only two small north-facing windows) (See before and after pictures here). This house is located in Canberra, ACT, which has a harsh climate. This should be considered when comparing energy rating results.

Steps taken to improve thermal performance, as modelled by Light House Architecture and Science. Orange represents the predicted heating load, blue represents the predicted cooling load.
Steps taken to improve performance
The steps considered to improve the energy rating were:
1. The existing EER rating was established as 1.3 NatHERS stars.
2. Small pop-out extensions would capture more northern solar gain (see floow plan below). Building these alone, and leaving the rest of the house as is, would have achieved 2.2 stars EER.
3. Replacing windows (often considered as a ‘magic pill’) with thermally-broken double glazing would have improved the rating to just 2.4 stars EER.
4. Installing a new roof allowing R5 ceiling insulation increases the rating to 4.6 stars EER.
5. Insulating the external walls, except for the garage, takes the home to 6.7 stars EER. This was a combination of R2.5 batts in new standard 90mm framed walls and XPS board insulation lining applied to retained concrete block walls.
6. The external wall between the home and the garage is sometimes missed. Treating that wall as a thermally external wall results in a 7.3 star EER rating.
7. The final touch, adding ceiling fans to living rooms and bedrooms, results in a 7.4 star EER rating.
Not captured in the NatHERS ratings was the priority placed on draft sealing throughout this process, as well as good quality window furnishings. These important details mean the home is expected to perform better than the 7.4 star rating predicts.
Note: While changing the order of these priorities would produce different comparative improvements, on the whole they would tell the same story.
Once the improvement areas are decided, it’s worth working with the EER consultant to assess where the best thermal return on investment lies. The graph below demonstrates how the energy rating would have changed with the level of ceiling insulation as the variable. This breakdown supports the installation of cost-effective R5 roof batts, which fit perfectly in the new 240mm roof rafters.

Ceiling insulation as the variable, diminishing returns modelled using BERS Pro 4.3 by Light House Architecture & Science. Orange represents the predicted heating load, blue represents the predicted cooling load. The columns represent different levels of insulation (R value). The bold numbers above each column represent the resulting star rating.
It’s also worth testing different glazing options. This will produce different results depending on many individual project factors. For this case study, double-glazed uPVC with a Low-E coating achieved the same energy rating as a more expensive triple-glazed unit would have.

Windows as the variable, modelled using BERS Pro 4.3 by Light House Architecture & Science. Orange represents the predicted heating load, blue represents the predicted cooling load. Note: a timber frame is used to demonstrate the triple-glazed option because a triple-glazed uPVC frame was not available in the software at the time.
Suggested steps for using NatHERS tools during design collaboration:
1. For renovations, model the existing home as a starting point.
2. Establish a ‘base case’ design that includes the most likely construction materials and the most
conservative version of the design (ie withhold from testing larger glazing at this point.)
3. Seek feedback from the assessor on any limiting design factors such as adding shading to a western window, or a northern eave that’s too big. Optimise your ‘base design’.
4. Execute different model runs that isolate the impact of each material option you are considering. This helps you understand where the best return on investment lies.
5. Collate the preferable material combination for your ‘90%’ outcome.
6. At this point, with your optimised outcome, you may like to test the impact of thermally-negative design changes. For example, if you’re pondering the impact of a bigger window to a significant view, testing this on your optimised design is the most informative stage to do so.
Want to to learn more about Jacob and Jade’s House?
You can read more about Jacob and Jade’s house, here.
Read the full resource: Residential Building Sustainability Rating Tools in Australia:
Click the image below to access the Paper or see it in its original location here.
